
Summary of brined chicken recipe
Want to serve the juiciest, most flavorful chicken your family has ever tasted? The secret is simple: chicken brine! Whether you’re roasting a whole bird or grilling up some thighs, brining can transform your chicken from dry and bland to moist and delicious. In this guide, we’ll cover everything from ingredients to equipment and instructions.
What is Chicken Brine?
Chicken brine is a saltwater solution that helps lock in moisture and infuse flavor into the meat. The salt in the brine changes the structure of the meat’s proteins, allowing it to retain more moisture throughout the cooking process. This process results in chicken that is incredibly juicy and tender. This technique works wonders whether you’re cooking chicken breasts, wings, or a whole bird.
Why chicken Brine? Here’s the Scoop
When you brine your chicken, you’re letting it soak in a saltwater bath that works magic – like, real magic. The salt does more than just flavor the outside; it seeps deep into the meat, bringing in moisture and tenderizing every bite. What you end up with is chicken that’s juicy, tender, and packed with flavor. Say goodbye to dry poultry forever.
Tips for Different Cooking Methods
- Grilling Brined Chicken: Brined chicken does exceptionally well on the grill. The moisture retention prevents the meat from drying out over high heat. For extra flavor, consider using a spice rub after brining to add a crispy, caramelized exterior.
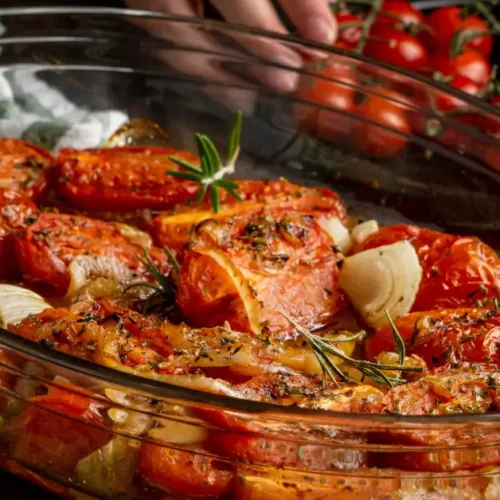
- Roasting Brined Chicken: A whole brined chicken roasts beautifully, with the skin browning perfectly. Try adding butter or olive oil under the skin before roasting to enhance the flavors even further.
- Fried Chicken After Brining: The secret to great fried chicken often starts with a brine. Brining ensures that even after frying, the meat stays juicy while achieving a perfect crispy coating.
Common Chicken Brining Mistakes to Avoid
- Not Cooling the Brine: Adding hot brine directly to raw chicken can start to cook the outer layer, leading to uneven texture and less flavorful meat. Always let your brine cool completely before adding the chicken.
- Over-brining: Leaving chicken in the brine for too long can result in meat that’s too salty and mushy. Stick to the recommended times based on the cut you’re using.
- Forgetting to Rinse: Always rinse brined chicken to avoid overly salty meat. This doesn’t wash away the flavor — it simply removes excess salt from the surface.
- Using Too Little Salt: The salt-to-water ratio is critical for proper brining. If you skimp on the salt, the brine won’t be as effective in breaking down muscle fibers and infusing moisture.
The Basics of a Brined Chicken
A good brine doesn’t need a fancy recipe – the basics go a long way. At its core, a brine’s got salt and water – that’s it. But once you get the hang of it, you can toss in all sorts of extras for extra flavor. Try these:
- Fresh herbs like rosemary or thyme
- Spices like black pepper, bay leaves, or garlic
- A little sugar to balance things out
Some folks even add a bit of vinegar or lemon juice to brighten things up. But don’t sweat it if you only got salt – it’ll still be amazing.
Getting That Brine Ratio Right
Alright, here’s where it matters: the salt-to-water ratio. Generally, you’ll want about 1/4 cup of salt per 4 cups of water. Mix it well, and make sure that salt’s fully dissolved. If you’re doing a whole bird, you might need more water to fully submerge it – just keep the same ratio.
If you’re feelin’ adventurous, you can swap the water for other liquids. Think apple cider for a touch of sweetness or a bit of beer for an earthy depth. Just keep in mind that each liquid will add its own twist.
Cooking That Perfectly Brined Chicken
Once your chicken’s brined, make sure you rinse it off. Too much salt on the surface can mess up the taste. Pat it dry, season if you like (though it’s already gonna be tasty!), and cook it up however you want – roast, grill, pan-fry. Brined chicken works wonders across the board.
What you’ll notice? That crispy skin. That juicy inside. And flavor all the way through. It’s like giving your chicken an all-access pass to flavor town.
Frequently Asked Questions
What are the effects of over-brining chicken?
If you brine for too long, the chicken can become overly salty and develop a mushy texture. To prevent this, be sure to follow the suggested brining times.
Can I reuse brine?
No, it’s best to discard used brine to avoid contamination from raw poultry.
Do I have to add sugar to my brine?
No, sugar is optional, but it does help balance the salt and can aid in caramelization during cooking.
Can I use the brine for other types of meat?
Absolutely! Brining works for turkey, pork, and even some types of fish. Just adjust the brining time and flavors to complement the protein.
Do I need to bring the water to a boil for the brine?
While bringing the water to a simmer helps dissolve the salt and sugar more quickly, it’s not strictly necessary. You can also mix the brine with cold water, but it will take longer for the salt and sugar to dissolve.
What happens if I accidentally over-brine my chicken?
If you realize your chicken has been in the brine for too long, rinse it thoroughly and let it soak in fresh water for about 30 minutes. This can help reduce the saltiness before cooking.
How long should I brine chicken?
The ideal brining time depends on the cut of chicken you’re using:
- Chicken breasts: 2 to 4 hours
- Chicken thighs or drumsticks: 4 to 6 hours
- Whole chicken: 12 to 24 hours
Over-brining can result in overly salty or mushy meat, so it’s important not to exceed the recommended times.
What is the formula for brine?
A classic brine formula follows a simple ratio:
- 1 quart of water (4 cups)
- ¼ cup kosher salt
- ¼ cup sugar (optional, but adds balance and aids browning)
You can scale this formula up or down depending on how much chicken you’re brining. Add aromatics like garlic, herbs, peppercorns, or bay leaves to enhance the flavor.
What is brine used for in chicken?
Brine is used to enhance both the moisture content and flavor of chicken. The salt in the brine breaks down some muscle proteins, allowing the meat to absorb more water. This results in juicier, more flavorful chicken when cooked, especially in dry-heat methods like roasting or grilling. The brine can also infuse the chicken with herbs and spices, making every bite more delicious.
Is it worth brining a chicken?
Yes, brining is absolutely worth it! It can significantly improve the texture and flavor of chicken, especially lean cuts like chicken breasts that tend to dry out quickly. Brining ensures that your chicken stays moist, tender, and packed with flavor, whether you’re grilling, roasting, or frying it. If you’re looking to elevate your chicken dishes, brining is a simple yet effective step.
Is brining safe?
As long as you keep the brine cold and don’t overdo the time, you’re all good. Just keep it in the fridge.
Final Thoughts on Brined Chicken
At the end of the day, brining is like a backstage pass for your brined chicken, getting it ready to steal the show. It’s simple, effective, and the taste difference? Night and day. Next time you’re looking for a crowd-pleaser, don’t skip the brine – your taste buds (and anyone you’re cooking for) will thank you.
So go on, give it a shot, and get ready to say goodbye to dry brined chicken for good.
Chicken Brine
Equipment
- Large pot or container for brining
- Whisk (for dissolving the salt and sugar)
- Refrigerator space (to store the brining chicken)
Ingredients
- 4 cups of water
- ¼ cup of kosher salt: use a fine salt for quicker dissolving
- ¼ cup of sugar: optional, but adds a nice caramelized crust
- 2-3 garlic cloves: crushed
- 1 tablespoon black peppercorns
- 2 bay leaves
- Fresh herbs like rosemary: thyme, or parsley
- 1 lemon: cut in halves
- Optional: ½ cup apple cider vinegar or ¼ cup soy sauce for extra depth in flavor
Instructions
Step 1: Prepare the Brine
- For a simple brine, use the following ratio:- 4 cups of water- 1/4 cup of kosher salt- 1/4 cup of sugar (optional)In a medium saucepan, heat the water and dissolve the salt and sugar by stirring. Once dissolved, let the brine cool completely. You can also add ice cubes to speed up the cooling process if you're short on time.
Step 2: Add Flavor (Optional)
- To enhance the flavor of your chicken, incorporate aromatic herbs and spices into the brine. Garlic, bay leaves, lemon zest, peppercorns, and fresh herbs like thyme or rosemary can infuse the meat with subtle flavors.
Step 3: Submerge the Chicken
- Place your chicken in a brining bag or food-grade container, and pour the cooled brine over it, ensuring the chicken is fully submerged. If necessary, place a plate on top of the chicken to ensure it stays fully submerged.
Step 4: Brine in the Fridge
- Let the chicken sit in the brine, refrigerated, for 1 hour per pound of meat, but no longer than 24 hours.- Chicken breasts: 1-2 hours- Whole chicken: 12-24 hoursIf you over-brine, the chicken may become too salty or mushy, so timing is key!
Step 5: Wash out and clean up the Chicken
- Once the brining period is over, take the chicken out of the brine and rinse it thoroughly under cold water to eliminate any excess salt. Next, gently pat the chicken dry with paper towels to ensure a crispy, golden-brown crust when cooking.
Step 6: Cook to Perfection
- Now it’s time to cook your brined chicken! Whether you’re grilling, roasting, or frying, use a meat thermometer.


20 thoughts on “The best brined chicken recipe; 3 unmissable tips”